A common goal to every computer user is to set their computer on a local network where they can be able to share their files and folders. So if you set up your mind to do that then the first thing you have to remember that your computer must be exist on the same network and Workgroup and the computer sharing files must have been a folder configured file along with the official permission in order to allow the other computers in the network to access that. So without wasting any time lets come to the today’s tutorials. In this tutorial I will show you step by step how to configure shared files and folder on your Windows 7 PC and how can you access them from Ubantu via your home network.
Procedure:
For accessing the Windows 7 shared folder from Ubuntu Operating System you have to move on step by step:
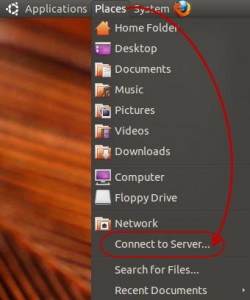
- Go to the top menu toolbar then click on the Places option and then click on the Connect to Server option. As for help follow the picture below:

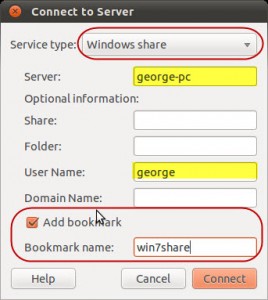
- In the Service type drop down menu select Windows share, in the server text field type the name of your Windows 7 pc, In the user account text type the user account name of your windows 7 along with access to shared folder. If you want to bookmark that page then no need to worry this option is also available here, just select Add bookmark option and type a name then click on connect. For help follow the following:

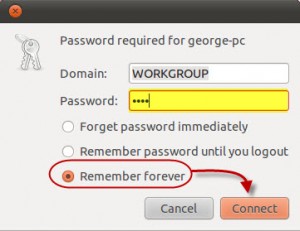
- After that you will be prompted to enter password for the Windows 7 user account which you have already typed earlier. Just type the password and select the option “Remember forever” and click connect as mentioned in the picture below.

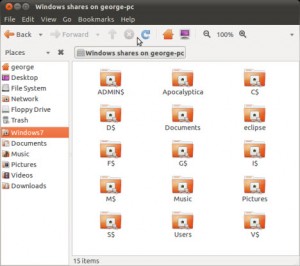
- Then the Windows 7 shared folders will be opened up in a new window as shown in the picture below and you can recognize them by $ sign after their letter. But you would not be able to access them you can only be able to access share folders and files.

- Just go and try that.