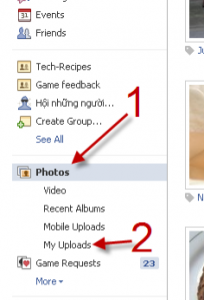
All the times when you upload a picture on the Facebook it always takes the first picture as the album cover. It is a by default features of the Facebook. But do you know there is an option for changing the album cover to the another photo in the same album? Yes there is an option regarding this and even you do not know how to change this then you need not to be worried. In this tutorial I shall teach you step by step how to do that. Just follow the following well. I believe you can do that easily.
Procedure:
- First type Facebook on your address bar.
- Then hit on the ctrl +enter button.
- Now Facebook will appear in front of you, just login to your account.
- Move your cursor towards Photos app option.
- Select My Uploads from there.

- Next again move your cursor towards Edit Album button of the album where you want to change the settings of it.

- Move towards Edit Photos tab there. Please note it should be your default tab each and every time when you are going to edit album information.

- Next find and select the photo that you want to see as your album cover.
- Now click on the “This is the album cover” button and fix it.

10. Do right click on the Save Changes at the button of the page of your browser.
11. Now you will find that your album cover will be successfully changed.
12. So it is so simple, just try it today.
13. And enjoy.